It’s a situation many of us are familiar with. You throw a barbecue, the kids show up with their smartphones, and the first thing they ask—before even saying hello—is, “What’s the WiFi password?” You give them the 25-character guest network password with 4 case-sensitive characters just to hear them complain, and sure enough, the “hello” is gone, but that’s my little revenge… Otherwise, isolated from the LAN, internet access only, dedicated VLAN—the infrastructure is clean. Except you have no control over what they’re browsing.
I could have just let it slide. But here’s the thing: I have strong opinions about what should be allowed on my network, and “letting it slide” isn’t one of them. So I set up DNS filtering. Zero budget, zero external dependencies, 100% under control.
The network context
My guest network runs on a dedicated VLAN (VLANXXX, 192.168.xxx.0/27), completely isolated from the production LAN. Guests have access only to the internet, nothing else. The “main” Wi-Fi for LAN machines is on a completely separate SSID—WPA2 Enterprise, hidden SSID, GPO for guest access—but that’s another story.
The guest VLAN is the public network: anyone can connect to it, but no one can abuse it. At least, that’s the goal.
Why not a cloud solution?
Cloudflare for Families, NextDNS, OpenDNS—all valid solutions on paper. But they have one thing in common: your DNS requests go to someone else. In a corporate context where you manage guest networks for external contractors, sending all their requests to a third party is a compliance issue worth considering.
And then there’s the principle. If I can do this internally, why not do it internally?
The architecture
Client VLANXXX
    ↓ DNS query to 192.168.XXX.xxx
Pi-hole (dedicated VM)
    ↓ unblocked domain → forward to Unbound
Unbound (localhost:5335)
    ↓ recursive resolution
Root servers → TLD → authoritative
    ↓ response sent back
Pi-hole → VLANXXX client
Pi-hole handles the filtering. Unbound performs recursive resolution directly from the root servers, without going through any external DNS. Blocklists are downloaded periodically and stored locally—if the internet goes down, filtering continues.
Dedicated VM or container?
It’s a valid question. Pi-hole is ultra-lightweight: 1 vCPU, 1 GB of RAM, 30 GB of virtual disk—it barely registers on a hypervisor’s metrics. An LXC on an existing VM would work perfectly well.
But in my infrastructure, the philosophy is one service = one VM. Not out of dogmatism, but for practical reasons: Veeam backs up each VM independently, disaster recovery planning is predictable, and a snapshot taken before an update doesn’t affect a neighboring service. An orphaned LXC on an existing VM is an operational debt that will have to be paid sooner or later.
So: a dedicated VM. Debian 12 or Ubuntu 24.04 LTS, your choice.
Installing Unbound
We install Unbound first—Pi-hole will need it as its upstream DNS.
sudo apt install unbound -y
Next, we create the configuration so that Unbound listens locally on port 5335:
sudo nano /etc/unbound/unbound.conf.d/pi-hole.conf
server:
    verbosity: 0
    interface: 127.0.0.1
    port: 5335
    do-ip4: yes
    do-udp: yes
    do-tcp: yes
    do-ip6: no
    prefer-ip6: no
    harden-glue: yes
    harden-dnssec-stripped: yes
    use-caps-for-id: no
    edns-buffer-size: 1232
    prefetch: yes
    num-threads: 1
    so-rcvbuf: 1m
    private-address: 192.168.0.0/16
    private-address: 172.16.0.0/12
    private-address: 10.0.0.0/8
Restart and verify:
sudo systemctl restart unbound
sudo unbound-checkconf
Resolution test:
dig google.com @127.0.0.1 -p 5335
The first query takes 70–80 ms (resolution from the root servers); subsequent queries will be cached. This is the expected behavior.
Installing Pi-hole
Pi-hole provides an interactive installation script. First, download it so you can run it:
curl -sSL https://install.pi-hole.net -o install.sh
sudo bash install.sh
> Note for environments with SSL inspection: if your firewall performs SSL inspection on outbound traffic, the installer may get stuck during the dependency download phase (snapd validates Canonical certificates using certificate pinning). In this case, install offline and configure the IP manually afterward.
The installer asks a few questions:
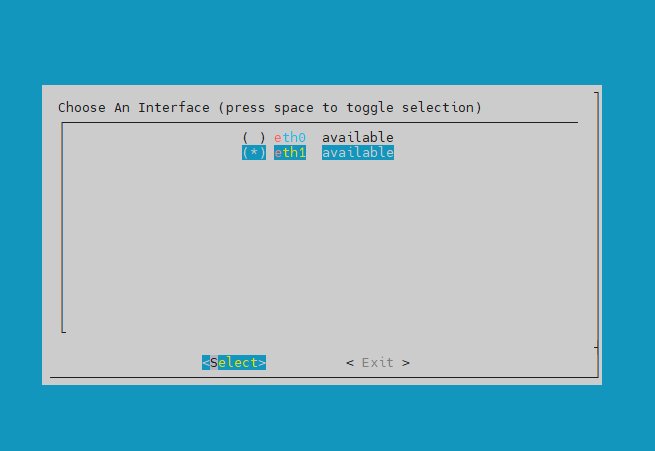
Listening interface: select the guest network interface (in our case eth1, 192.168.XXX.xxx).
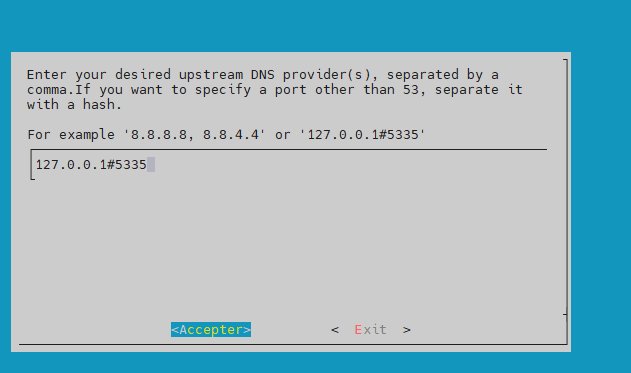
Upstream DNS: choose Custom and enter 127.0.0.1#5335 — this is our local Unbound.

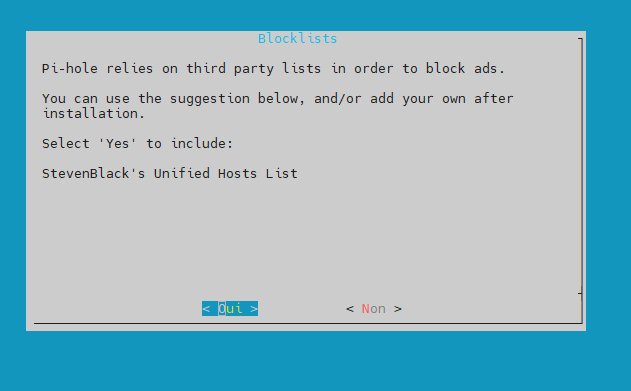
Default Blocklist: Accept StevenBlack's Unified Hosts List. We'll add other lists later.
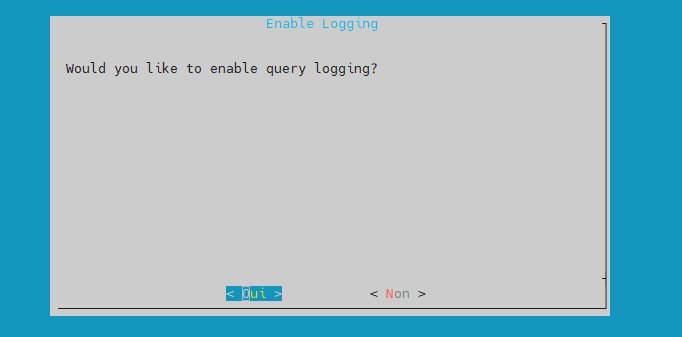
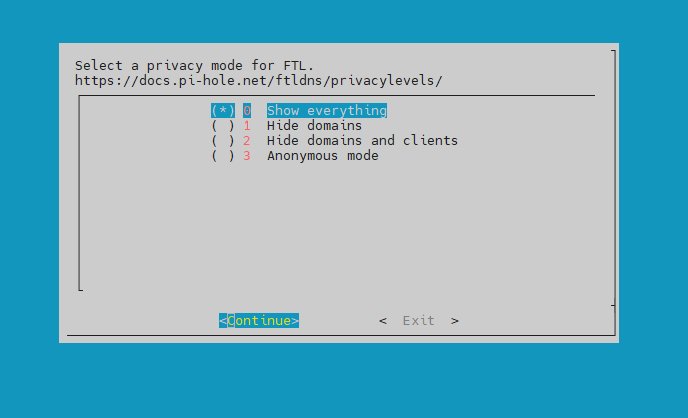
Query logging: Enable it. This is essential for debugging and to verify that filtering is working.
Privacy mode: leave it set to "Show everything" for full visibility.
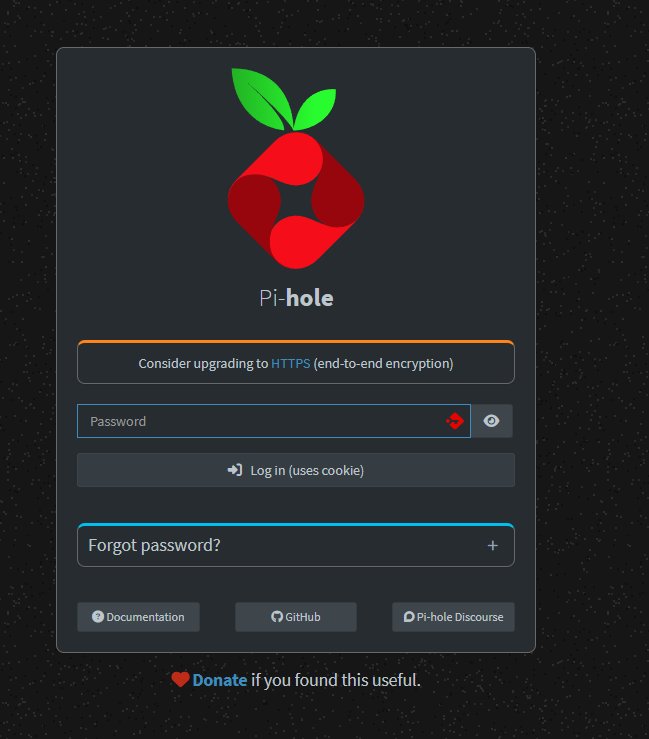
At the end of the installation, Pi-hole displays the password generated for the web interface. Make a note of it; you can change it using sudo pihole setpassword.

> Pi-hole v6: Starting with version 6, Pi-hole includes its own web server (FTL) and no longer uses lighttpd. If you previously installed lighttpd separately, disable it: sudo systemctl disable --now lighttpd && sudo systemctl restart pihole-FTL
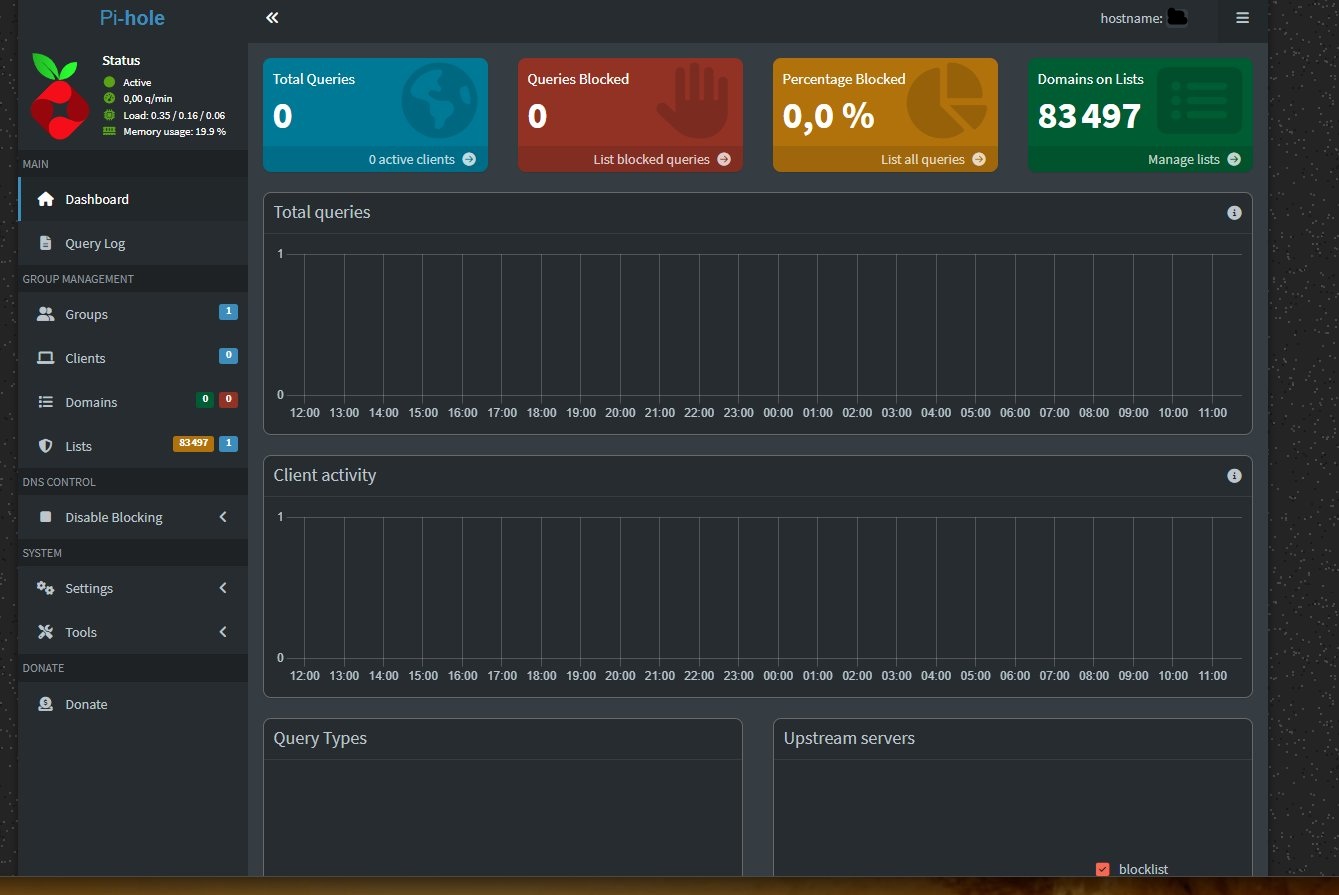
The web interface is accessible at http://[IP]:80/admin:
Blocklists
Pi-hole does not natively support categories—it works with domain lists. The choice of lists determines what gets filtered.
Selection Strategy
Rather than randomly stacking lists, here is a reasoned, tiered approach:
Non-negotiable baseline for a guest network:
- Malware and phishing
- Adult content/pornography
- Gambling
Reasonable for a network with minors:
- Drugs
- Violent content
- Warez/piracy
Optional depending on the context:
- Advertising and tracking (privacy bonus)
- Social media (often counterproductive on a guest network)
The UT1 Lists (Université Toulouse Capitole)
Toulouse Capitole University has maintained a categorized blacklist for years, widely used in French educational institutions. It is available via a community-maintained GitHub mirror.
The advantage: clear categories, active maintenance, public and auditable French source.
> Note: certain categories such as adult and porn do not exist as separate files on this mirror—they are replaced by mixed_adult. Always check the URLs before adding a list.
In Pi-hole v6, lists are added via the API. Start by retrieving an authentication token:
export PIHOLE_PASS='your_password'
SID=$(curl -s -X POST http://localhost/api/auth \
  -H "Content-Type: application/json" \
  -d "{\"password\":\"$PIHOLE_PASS\"}" | python3 -c "import sys,json; print(json.load(sys.stdin)['session']['sid'])")
Then add the UT1 lists:
for URL in \
  "https://raw.githubusercontent.com/olbat/ut1-blacklists/master/blacklists/malware/domains" \
  "https://raw.githubusercontent.com/olbat/ut1-blacklists/master/blacklists/phishing/domains" \
  "https://raw.githubusercontent.com/olbat/ut1-blacklists/master/blacklists/gambling/domains" \
  "https://raw.githubusercontent.com/olbat/ut1-blacklists/master/blacklists/warez/domains" \
  "https://raw.githubusercontent.com/olbat/ut1-blacklists/master/blacklists/mixed_adult/domains" \
  "https://raw.githubusercontent.com/olbat/ut1-blacklists/master/blacklists/drogue/domains" \
  "https://raw.githubusercontent.com/olbat/ut1-blacklists/master/blacklists/dangerous_material/domains"
do
  curl -s -X POST "http://localhost/api/lists?type=block" \
    -H "Content-Type: application/json" \
    -H "sid: $SID" \
    -d "{\"address\":\"$URL\",\"comment\":\"UT1\"}"
done
The Hagezi NSFW List
For adult content, the UT1 mixed_adult lists are too limited (149 domains). The Hagezi NSFW list is much more comprehensive—it covers over 93,000 domains in ABP format, natively supported by Pi-hole v6:
curl -s -X POST "http://localhost/api/lists?type=block" \
  -H "Content-Type: application/json" \
  -H "sid: $SID" \
  -d '{"address":"https://raw.githubusercontent.com/hagezi/dns-blocklists/main/adblock/nsfw.txt","comment":"Hagezi NSFW"}'
DoH Blocking
DNS over HTTPS is the primary method for bypassing DNS filtering. Modern browsers (Chrome, Firefox, Safari) enable it by default and silently bypass the network's DNS.
We block known DoH domains using the dedicated Hagezi list:
curl -s -X POST "http://localhost/api/lists?type=block" \
  -H "Content-Type: application/json" \
  -H "sid: $SID" \
  -d '{"address":"https://raw.githubusercontent.com/hagezi/dns-blocklists/main/adblock/doh.txt","comment":"Hagezi DoH blocklist"}'
> Important: This list blocks DoH domains, not IP addresses. For complete blocking, you must also block TCP port 443 to the IP addresses of known DoH resolvers (1.1.1.1, 8.8.8.8, 9.9.9.9, etc.) at the firewall level. Any firewall—pfSense, OPNsense, FortiGate, Mikrotik—can do this with a "REJECT destination DoH-IPs service HTTPS" rule.
Updating Gravity
After adding all the lists, update the filtering database:
sudo pihole -g
Forced SafeSearch
Pi-hole cannot filter page content—only block domains. For Google Images and YouTube, you cannot block google.com without blocking Google entirely.
The solution: force SafeSearch mode via DNS. Google, Bing, and YouTube expose dedicated SafeSearch endpoints. By redirecting their domains to these endpoints, the browser is directed to the filtered version without being able to easily bypass it.
First, retrieve the IP address of the Google SafeSearch endpoint:
dig forcesafesearch.google.com +short
# 216.239.38.120
In Pi-hole v6, this is configured in /etc/pihole/pihole.toml, in the hosts section:
sudo nano /etc/pihole/pihole.toml
Find the line hosts = [] (in the DNS section, around line 134) and replace it with:
hosts = ["216.239.38.120 www.google.com", "216.239.38.120 www.google.fr", "216.239.38.120 www.youtube.com"]
Restart FTL:
sudo systemctl restart pihole-FTL
Verification:
dig www.google.com @192.168.XXX.xxx +short
# Should return 216.239.38.120
> Note: Forced SafeSearch only works correctly if the client uses Pi-hole DNS. With DoH enabled on the client side, the redirection is ignored. Hence the importance of blocking DoH both via Pi-hole (domains) and via the firewall (IPs).
Forced DNS Redirection at the Firewall Level
To prevent a client from bypassing Pi-hole by manually configuring an external DNS (8.8.8.8, for example), add a DNS redirection rule at the firewall level.
The principle is generic and applicable to any firewall:
- Create a Virtual IP that redirects all DNS traffic (UDP/TCP 53) to the Pi-hole’s IP (192.168.XXX.xxx)
- Create a policy that intercepts DNS traffic from the guest VLAN to this VIP
- Place this rule before the normal internet access rule
This way, even a client who types 8.8.8.8 as the DNS server will have their requests silently redirected to Pi-hole.
Result
After full configuration:
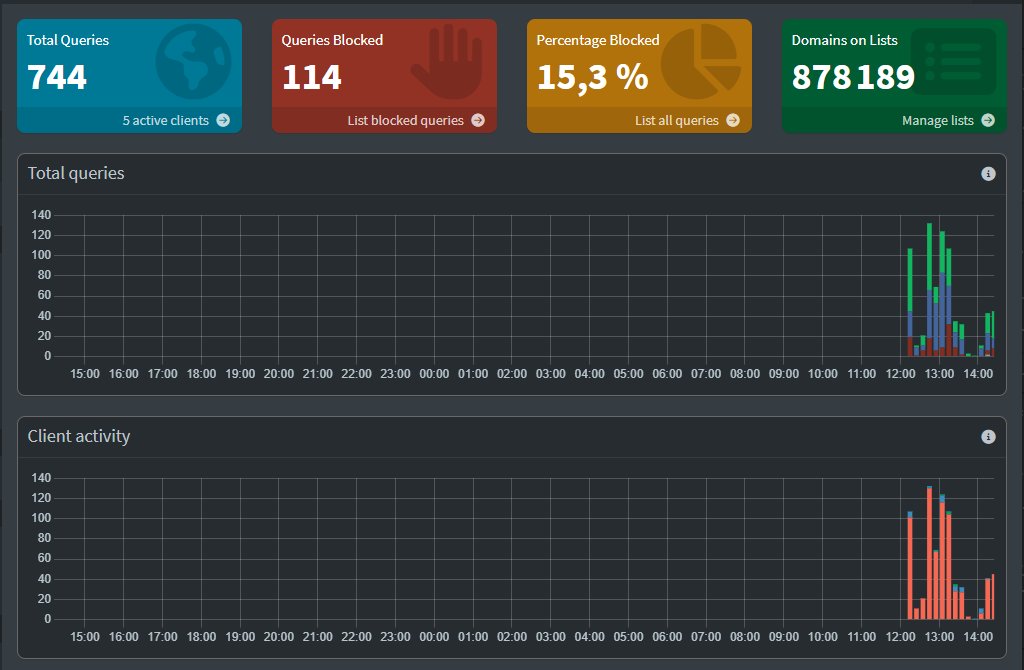
878,189 blocked domains spread across 9 lists:
- StevenBlack Unified: 83,497 (ads, general malware)
- UT1 malware: 672,746
- UT1 phishing: 672,580
- UT1 gambling: 32,233
- Hagezi NSFW: 93,911 (ABP format)
- Hagezi DoH: 3,407
- UT1 warez, drugs, dangerous_material: ~2,000
The dashboard shows client requests in real time, what is being blocked, and from which client. Useful for monitoring behavior and identifying potential false positives.
Automatic list updates
Pi-hole updates its blocklists automatically via a cron job that runs by default on Sundays at 1 a.m. No configuration required.
For updates to Pi-hole itself:
sudo pihole -up
In conclusion
In just a few hours of work, you have a fully independent DNS filtering system, with no external dependencies, applicable to any infrastructure. The VM runs on 1 vCPU and 1 GB of RAM—it doesn’t show up in the metrics.
The next barbecue will be under filtering. The teens will have internet, but not the rest. And if one of them tries to set 8.8.8.8 as the manual DNS, the firewall will handle it.
In a future episode, we’ll see how to take it further with an open-source captive portal for temporary access—the typical case of external contractors in a company who need Wi-Fi access for the duration of a project.
Daily Management — False Positives and Manual Blacklist
The query log is the central tool for daily monitoring. It lists all DNS queries in real time with the status (blocked/allowed), domain, client, and response time.
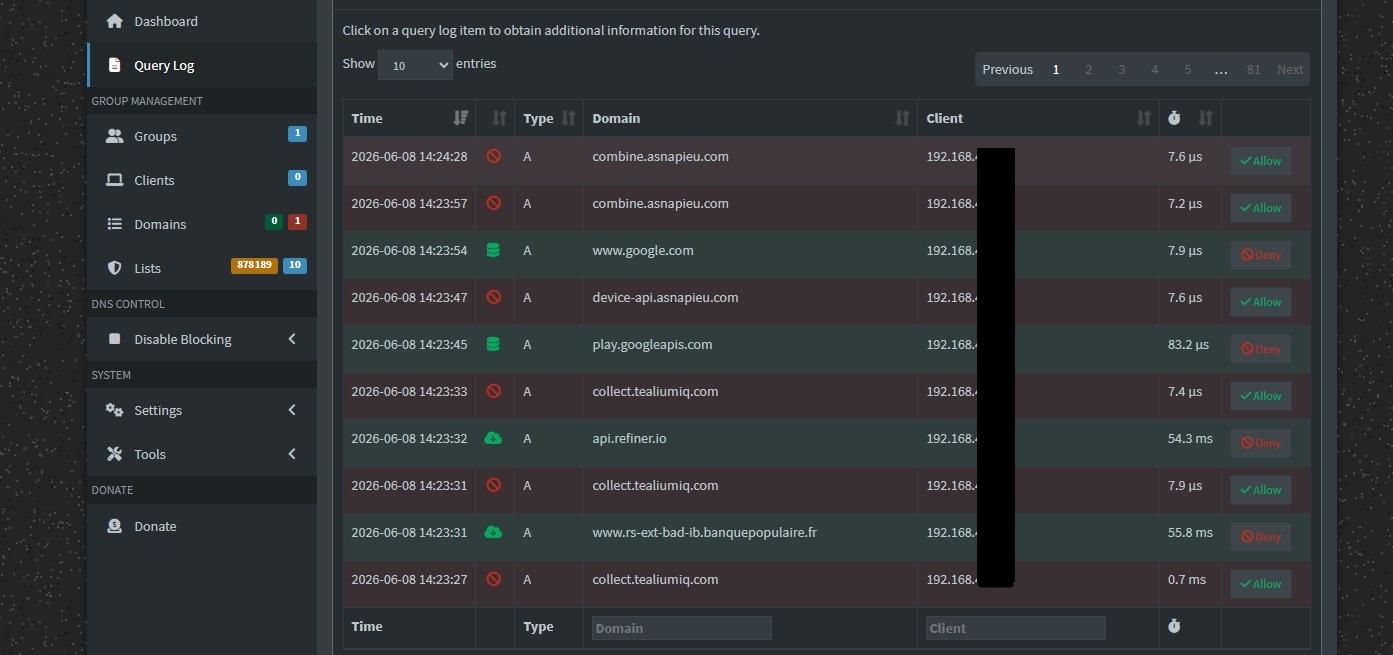
From this log, two buttons at the end of each line allow you to take immediate action:
- Allow: adds the domain to the whitelist — useful for unblocking a false positive (a legitimate service blocked by an overly aggressive list)
- Deny: adds the domain to the manual blacklist
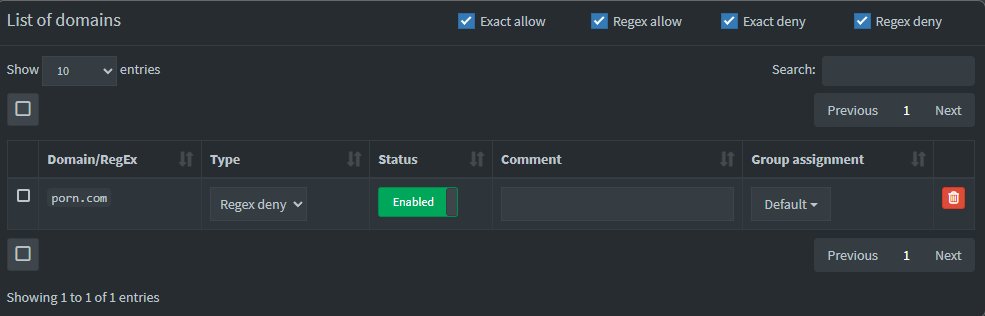
Clicking "Deny" creates a Exact deny by default — the exact domain is blocked. You can then change the entry to Regex deny from the Domains section, which covers the root domain and all its potential subdomains. For a domain like porn.com, the Regex deny is preferable.
The whitelist works on the same principle—essential when a blocklist that is too broad affects a legitimate service. The query log allows you to quickly identify the domain to unblock without having to disable an entire list.