This article is in response to a request from @Menvé, a site member and cybersecurity instructor: his students were looking for a clear and comprehensive guide on the RJ45. Because we often forget—especially when we’re just starting out in cybersecurity—but it all starts here: the physical layer is the foundation on which everything else rests. It’s hard to understand segmentation, VLANs, or 802.1X without knowing what’s actually traveling through the cables. For segmentation and VLANs, you can also check out @SilenS’s excellent articlehttps://aperturezone.fr/posts/cisco-firewall-final/
This guide breaks down the subject without unnecessary jargon: color standards, cable categories, connectors, and tools. It’s enough to give his class— and everyone else—a solid foundation on which to build. Thanks to him for the suggestion.
> The Essentials in 30 Seconds > > - The real name of the RJ45 is 8P8C (8 positions, 8 contacts). > - T568A and T568B are two equivalent color codes: it doesn’t matter which one you use, as long as both ends of a straight-through cable have the same configuration. > - The category (Cat5e, Cat6, Cat6a…) is a guarantee of data transfer rate over 100 m under worst-case conditions. On short runs, an old cable easily outperforms its rated specifications. > - For new cable, Cat6a is the default choice (10 Gbps, and it’s still RJ45). > - A “RJ45” Cat7 isn’t really Cat7—it’s just marketing.
RJ45 Doesn’t Exist (Or Almost Doesn’t)
Let’s start with a bit of a culture shock: the connector everyone calls “RJ45” has never been standardized under that name for computing. Its real name is 8P8C — 8 Positions, 8 Contacts.
The “RJ” abbreviation (Registered Jack) comes from U.S. telephone regulations and referred to jacks, not connectors. Since computer networks aren’t part of the public utility sector, no official “RJ45” standard applies to them. In short: “RJ45” is a universal and ingrained misnomer. We’ll continue to use it here for the sake of clarity—but knowing this helps you spot technical specifications that are full of nonsense.
As for French regulations: since January 1, 2008, the NF C 15-100 standard requires 8P8C jacks in new construction, extensions, and complete renovations. The RJ45 has therefore become the standard jack for residential use, including voice.
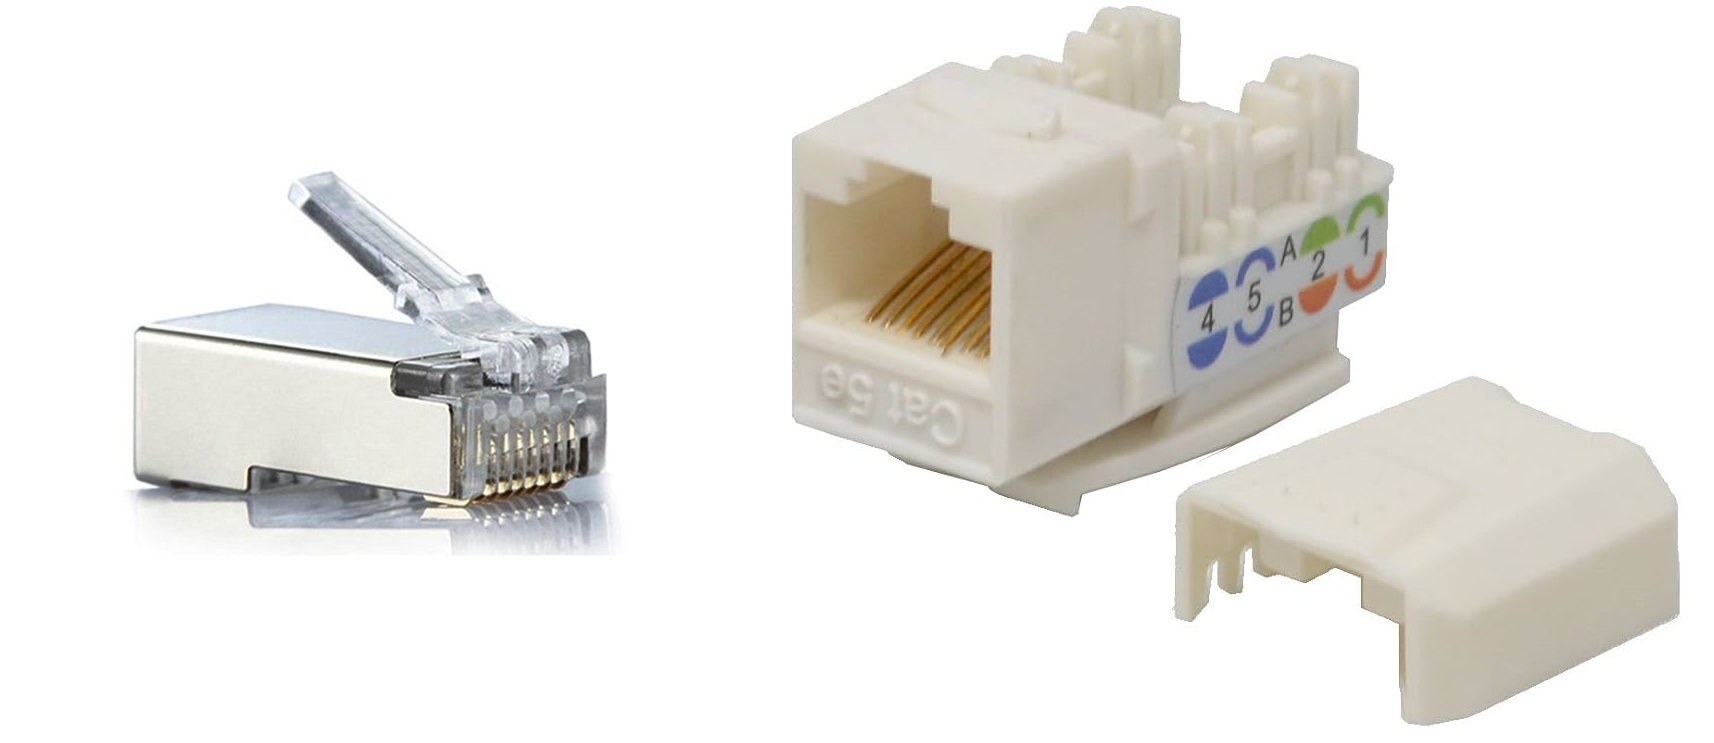
Anatomy of the Connector
The 8P8C is a snap-in connector: eight small contact blades at the front, a locking tab on the side. The male connector is crimped onto the end of the cable; the female part is found on your equipment, wall jacks, and keystone modules.
It has cousins in the same family that you’ll encounter in a network infrastructure:
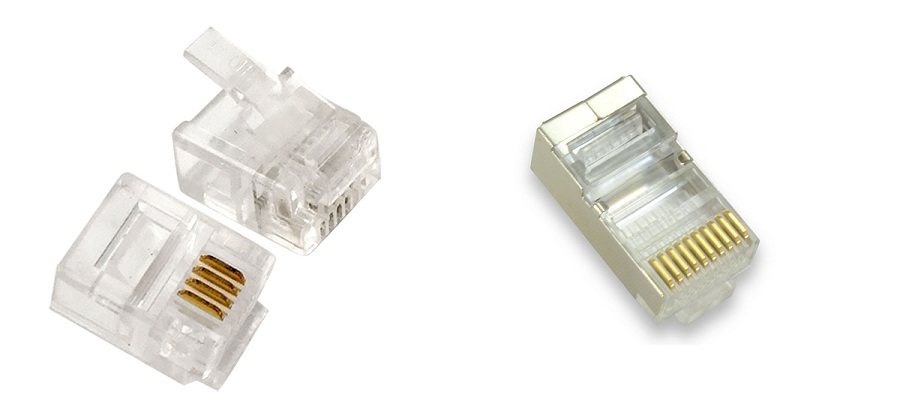
- RJ11 (the telephone connector, narrower): it physically fits into an RJ45 jack. This is what allows the same wall jack to be used for both voice and data.
- RJ50 (wider, 10 contacts): used primarily to control UPS units. It does not fit into an Ethernet port—do not confuse the two.
Two details to avoid headaches
Solid or stranded? RJ45 plugs come in two versions, depending on the cable:
- Solid-core cable → for fixed installations in walls and cable trays. Better for long distances, but prone to breaking if bent frequently.
- Stranded cable (stranded) → for patch cords, which are moved around.
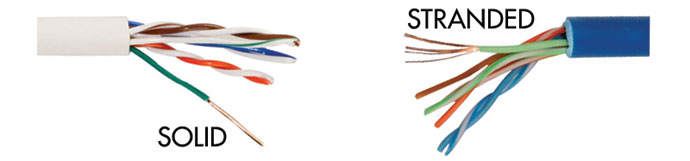
Crimping a connector designed for solid wire onto stranded wire (or vice versa) results in unreliable contact: it may work during testing but fail later. Check the label on the package.
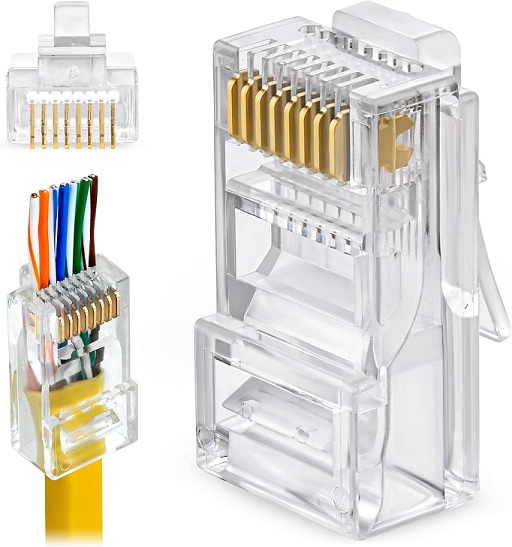
Pass-through connectors: the wires protrude from the front. Align them, visually check the order, crimp, and the crimping tool trims the excess. This is much easier to get right. The only downside: outdoors or with PoE, if any copper remains exposed, watch out for corrosion. In those cases, standard jacks or keystone jacks are preferable.
Colors: T568A and T568B
This is the source of 90% of the questions. There are two ways to arrange the wires in the connector, defined by the TIA/EIA-568 standard: T568A and T568B.
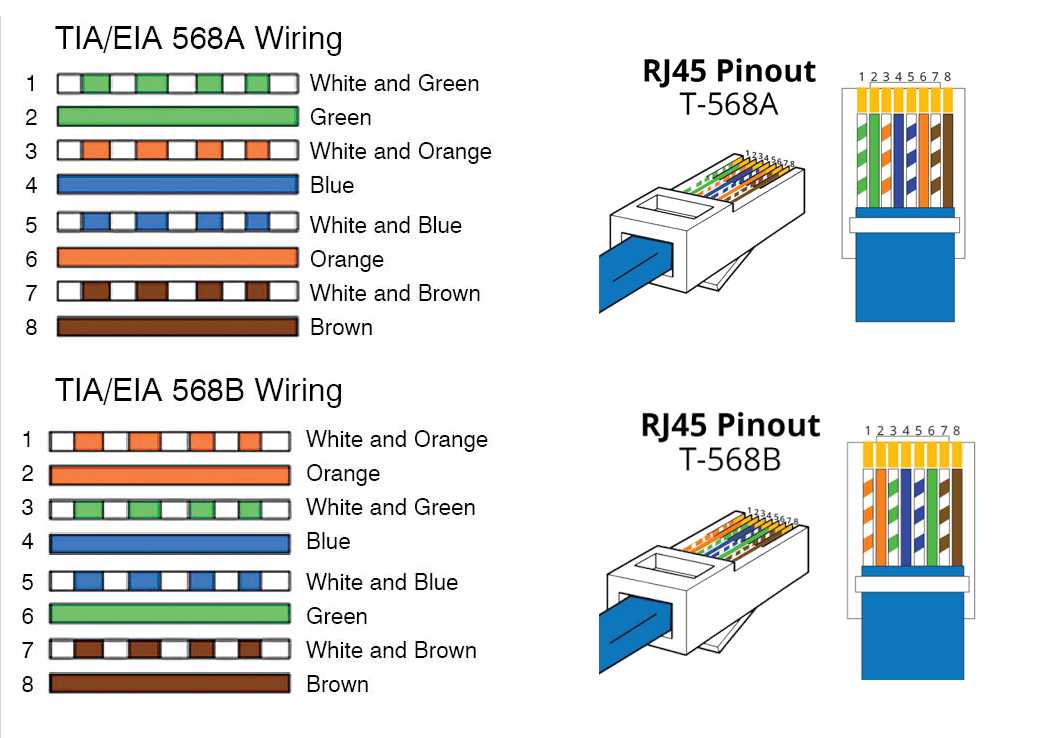
The only difference: the orange and green pairs are swapped. Everything else stays the same. And most importantly: there is no difference in performance between the two. The choice is purely a matter of convention.
The golden rule (remember this even if you forget everything else)
- Straight-through cable = the same standard at both ends (A–A or B–B). This is the standard case: PC, server, or router to a switch. 99% of your cables.
- Cross-over cable = A on one end, B on the other. It was once used to connect two identical devices. Today, Auto-MDIX (found on all gigabit devices) handles this automatically: crossover cables are now used almost exclusively for troubleshooting old hardware.
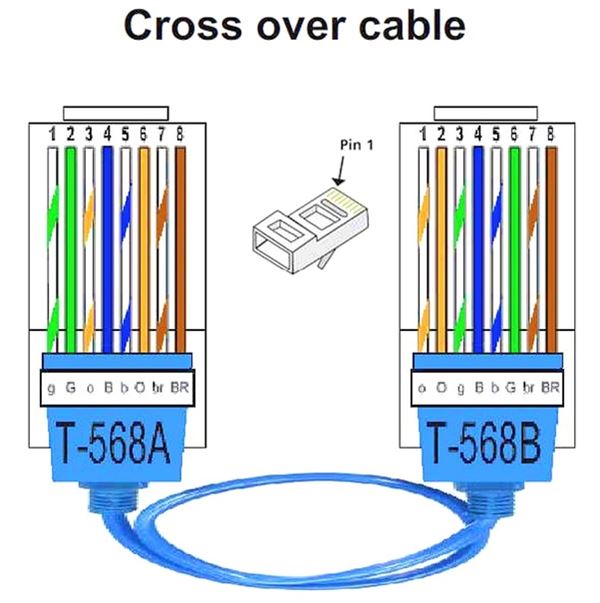
In Europe, cables are generally terminated according to the T568B standard. But the real criterion is consistency: if the existing setup uses A, stick with A everywhere. Decide on a standard once and for all, and stick to it.
Categories: What Are They, and Which One Should You Choose?
A cable’s category is a promise: “I guarantee you this data rate over 100 meters, even under poor conditions .” Three factors change together from one category to the next: the supported frequency (in MHz—basically the “pipe width”), the possible data rate, and the corresponding quality of manufacturing.
| Category | Frequency | Data Rate / Distance | Status |
|---|---|---|---|
| Cat5 | 100 MHz | 100 Mbps guaranteed | No longer sold—but still delivers very decent gigabit performance over short distances (see below) |
| Cat5e | 100 MHz | 1 Gbps / 100 m | The bare minimum, still perfect for gigabit |
| Cat6 | 250 MHz | 1 Gbps / 100 m — 10 Gbps over only ~55 m | Common |
| Cat6a | 500 MHz | 10 Gbps / 100 m | The true 10G tier, the standard today |
| Cat7 / 7a | 600–1000 MHz | 10 Gbps / 100 m | GG45/TERA connectors — not true RJ45 |
| Cat8 | 2000 MHz | 25 / 40 Gbps over 30 m | Data centers / short rack-to-rack connections |
Cat5e: The Underrated Cable That Gets the Job Done
Cat5e is often dismissed as “outdated”. Wrongly so. It guarantees gigabit speeds over 100 m, which covers the vast majority of home needs and quite a few business needs. As long as you don’t have devices that actually support 10 Gbps, it’s enough.
Personal experience. I wired my house with Cat5 in the very early 2000s—so even before Cat5e became widespread, and at a time when gigabit speeds were almost a luxury. Twenty years later: stable gigabit speeds everywhere, not a single packet lost.
There’s nothing magical about the secret. My longest run is 25 m, well short of the 100 m limit, and the terminations are clean. But that’s precisely why it’s important to understand what a category really means: Cat5 officially guarantees 100 Mbps, but that guarantee is based on the worst-case scenario over 100 m. On a short, well-installed run, the margin is enormous. Technically, Gigabit Ethernet (1000BASE-T) uses all 4 pairs with echo cancellation and was designed to run on Cat5; Cat5e simply tightened the tolerances to guarantee what, in practice, was already working very well. At 25 m, we’re comfortably within spec.
Same goes for aggregation: my LACP trunks run on Cat5e and handle their load perfectly. It makes sense when you think about it—LACP bundles multiple physical links to aggregate bandwidth and provide redundancy, but each link on its own only needs to support its own throughput (in this case, gigabit). The category is therefore determined per physical link, never based on the trunk’s cumulative throughput. Four aggregated gigabit Cat5e links make up a 4 Gbps trunk without requiring any “higher-grade” cable.
What about PoE? Power over Ethernet transmits power over the same pairs as the data: a single cable is enough to power a device, without needing a nearby wall outlet. At my place, my cameras and Wi-Fi access points are powered by PoE over Cat5e—and once again, it works like a charm. Cat5e has no problem with PoE: in fact, the standard specifies that power can be delivered up to 100 m. And—you know the drill by now—my runs are 25 m at most, which is no small detail here: with PoE, the longer the cable, the greater the voltage drop (copper has resistance; it “eats up” a few watts along the way). At 25 m, the loss is negligible, and I have a huge margin, even for Wi-Fi access points that draw a fair amount of power. The only real pitfall with PoE is low-quality CCA (aluminum-clad copper) cable, which heats up and causes voltage drop: with real copper—which is what I have—the problem doesn’t exist.
The lesson to be learned: don’t throw out working cabling just because it’s “old.” If your Cat5/Cat5e gives you the desired throughput, there’s no reason to redo everything. The category matters most when installing new cabling.
Cat6 and Cat6a: Where It Really Matters
Cat6 handles gigabit speeds with ease, and even 10 Gbps… but only up to ~55 m (less in noisy environments). Beyond that, it drops back down to 1 Gbps.
For guaranteed 10 Gbps over 100 m, it’s Cat6a — and it is the true “future-proof” choice, not Cat7. For new installations today, the price difference compared to Cat6 is minimal, and the long-term benefit is well worth it.
Cat7: The Pitfall of This Article
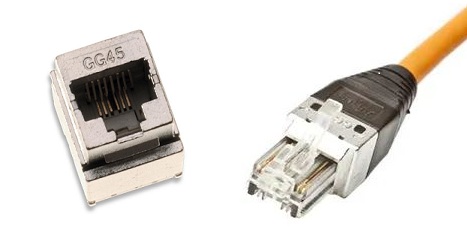
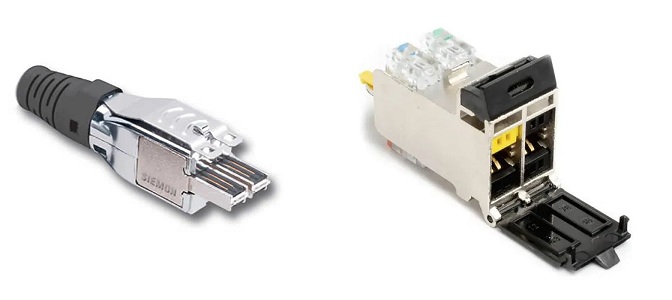
Be careful with Cat7, especially in an article about RJ45. The “true” Cat7 standard calls for GG45 or TERA connectors, not standard RJ45, and it isn’t even recognized by the TIA/EIA. Cable sold as “Cat7 with RJ45 connectors” is therefore not Cat7 in the strict sense: its actual performance is closer to that of a good Cat6a cable, but it’s stiffer and more expensive. For an infrastructure that remains RJ45-based, it offers no added value. Best avoided, unless there is a very specific need for immunity to interference.
Cat8: The Rack Niche
Up to 25 or 40 Gbps, but limited to 30 m. This is for switch-to-switch or server-to-switch connections within a rack. Good news: Cat8.1 retains the RJ45 connector. Outside of a rack running 25/40G, it’s a waste of money.
The 100-meter Limit
Regardless of the category (excluding Cat8), a copper link is limited to 100 m: in practice, 90 m of fixed cabling + 10 m of patch cords at both ends. Need to go further? Add a relay switch, or switch to fiber.
Shielding: Do You Need “Shielded” Cables?
Some cables have a metallic foil or a braided shield around the pairs to protect them from interference. The notation (ISO/IEC 11801 standard) is read as overall shield / pair shield:
- U/UTP: no shielding at all. The classic residential cable—flexible and inexpensive.
- F/UTP: a foil shield around the entire cable. Typical for Cat6a.
- S/FTP: overall braid plus each pair individually shielded. Maximum protection, but stiff and expensive.
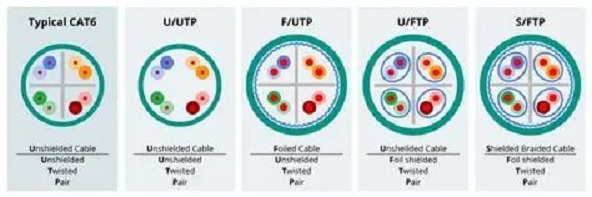
When to use shielding? Only if there is electrical noise: proximity to power cables or motors, industrial environments, very dense cable runs, or high-power PoE in heavily loaded cable trays. In a typical residential setting, U/UTP is more than sufficient—in fact, that’s what’s been powering my home for twenty years.
The pitfall of shielded cables: shielding is useless if it isn’t properly grounded. If connected incorrectly, it can be worse than an unshielded cable. And it requires a consistent setup: the cable, connectors, and panels must all be shielded and grounded. Mixing shielded and unshielded cables haphazardly is counterproductive. In short: you should only use shielded cables if you follow through with the entire process.
Connectors: What Goes at the End?
There are several ways to terminate a cable, and they are not all equal.
-
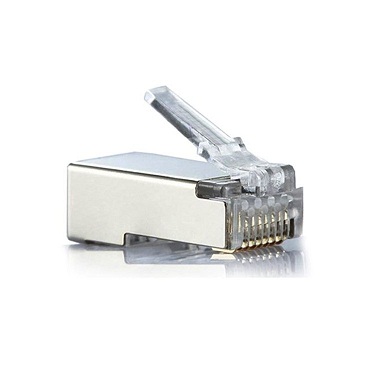
Crimped male RJ45 connector: quick and convenient for a one-off cable or to repair a damaged end. It’s acceptable, but more sensitive to the quality of the crimping.
-
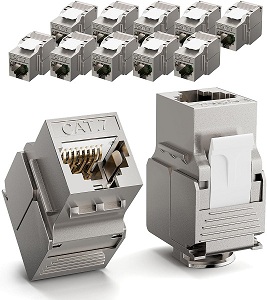
Keystone module: the female connector that clips into a wall plate or panel. It’s installed using a specialized tool, making it much more forgiving and durable. This is the “clean” termination " termination on the wall side.
-
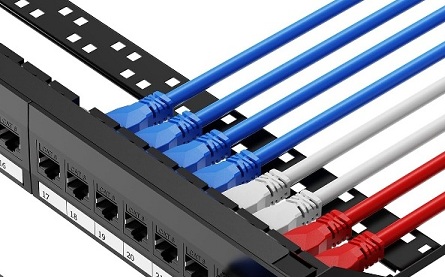
Patch panel: typically 8 to 48 keystones in a rack-mount enclosure. The point where all your cables terminate.
-
Pre-terminated patch cord: the flexible connection between the jack/panel and the equipment. Factory-tested, replaceable in ten seconds.
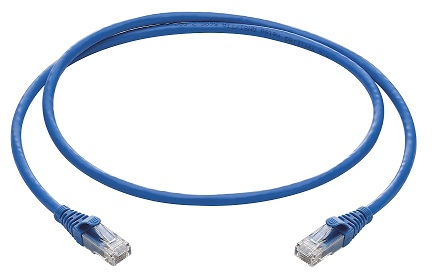
Best practice, at home and in a rack:
> Fixed single-strand cable → keystone jack / patch panel at both ends → pre-terminated patch cords to the equipment.
The idea: never crimp a connector directly onto the end of a recessed cable if it can be avoided. If a patch cord fails, you can replace it without touching the wall.
Tools
The essentials, from the basics to the professional-grade:
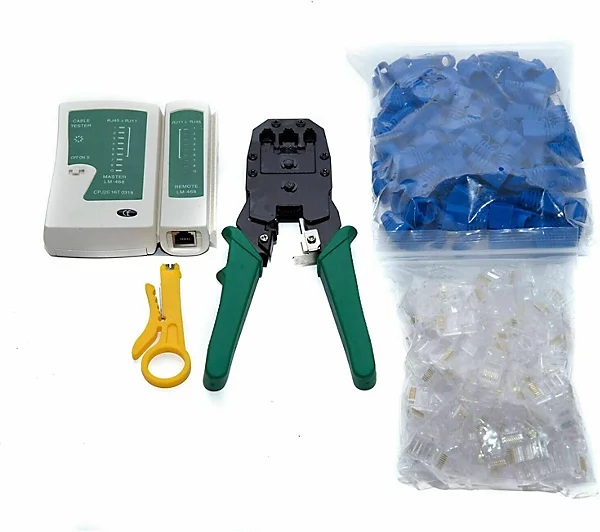
- Wire stripper: to remove the jacket without damaging the wires inside (a freehand utility knife always ends up damaging one).
- Crimping pliers: to secure the connector. Choose a high-quality pair that’s compatible with your connectors (through-hole or not). Low-end pliers will result in a string of botched crimps.
- Punch-down tool: for keystones and panels. It pushes the wire into the contact and cuts off the excess in one go.
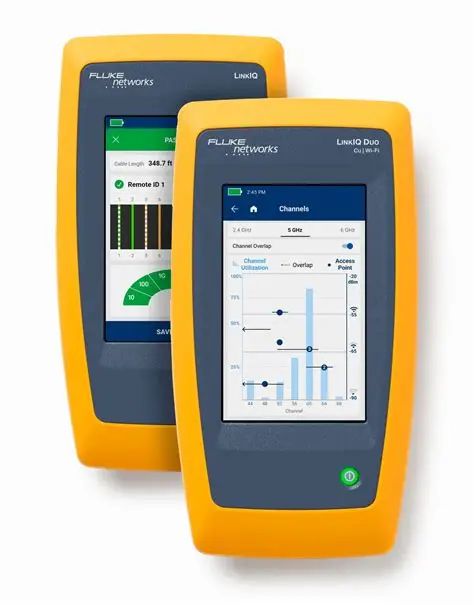
- Cable tester: two very different worlds.
- The basic tester verifies that all 8 wires are properly connected and in the correct order. Essential, but it does not measure the quality of the connection (it may miss a split pair).
- The certifier (such as the Fluke DSX) actually measures noise, loss, and PoE capacity, and certifies the link according to its category. This is the only reliable way to verify 10 Gbps performance—but it’s an investment.
The Most Time-Consuming Mistakes
- Over-untwisting when preparing the connector: max 13 mm for Cat6. Every centimeter of untwisting adds noise. This is the number one cause of poor high-speed performance.
- Split pair (pins 3/6 separated): passes the basic tester, but fails the gigabit test.
- Accidentally mixing A and B on a straight-through cable → unintentional crossover cable.
- Inappropriate connector: wrong type (solid/stranded) or lower category than the cable. The weakest link dictates performance for the entire connection.
- Shielding improperly connected to ground, or inconsistent shielded/unshielded configuration.
- Exceeding 100 m with copper.
In Practice: My Recommendations
- If it works, don’t touch it. There’s no reason to redo Cat5/Cat5e cabling that delivers the desired throughput—mine has been working perfectly for twenty years.
- For new installations: Cat6a everywhere. 10 Gbps over 100 m, future-proof, and it’s still RJ45. No need to pay for Cat7.
- Terminate with keystones and a patch panel; use pre-made patch cords. Crimp by hand mainly for troubleshooting.
- U/UTP in clean indoor environments; use shielded cable only if the environment requires it—and in that case, shielded end-to-end and grounded.
- Cat8 only for short 25/40G connections within the rack. Elsewhere, it’s unnecessary.
- Test every cable run. At a minimum, use a simple tester; use a certifier if you’re aiming for serious 10G performance.
- Document the standard (A or B) and adhere to it throughout the entire installation.