I dug out a good old Z77, LGA1155, thinking there must still be a way to turn it into something interesting, like a Truenas. It’s already survived way more overclocking than it should have, and it’s never flinched…
I boot it up, BIOS F18. Let’s start by updating it to F22, and that’s when the drama begins.
It boots up, flashes, reboots… and then, nothing. No display. No beep. The CPU cooler is spinning, the LEDs are lit, and the machine reboots on its own as if nothing happened. Over and over. Endlessly.
Welcome to old-school BIOS debugging.
What’s under the hood: Gigabyte’s DualBIOS
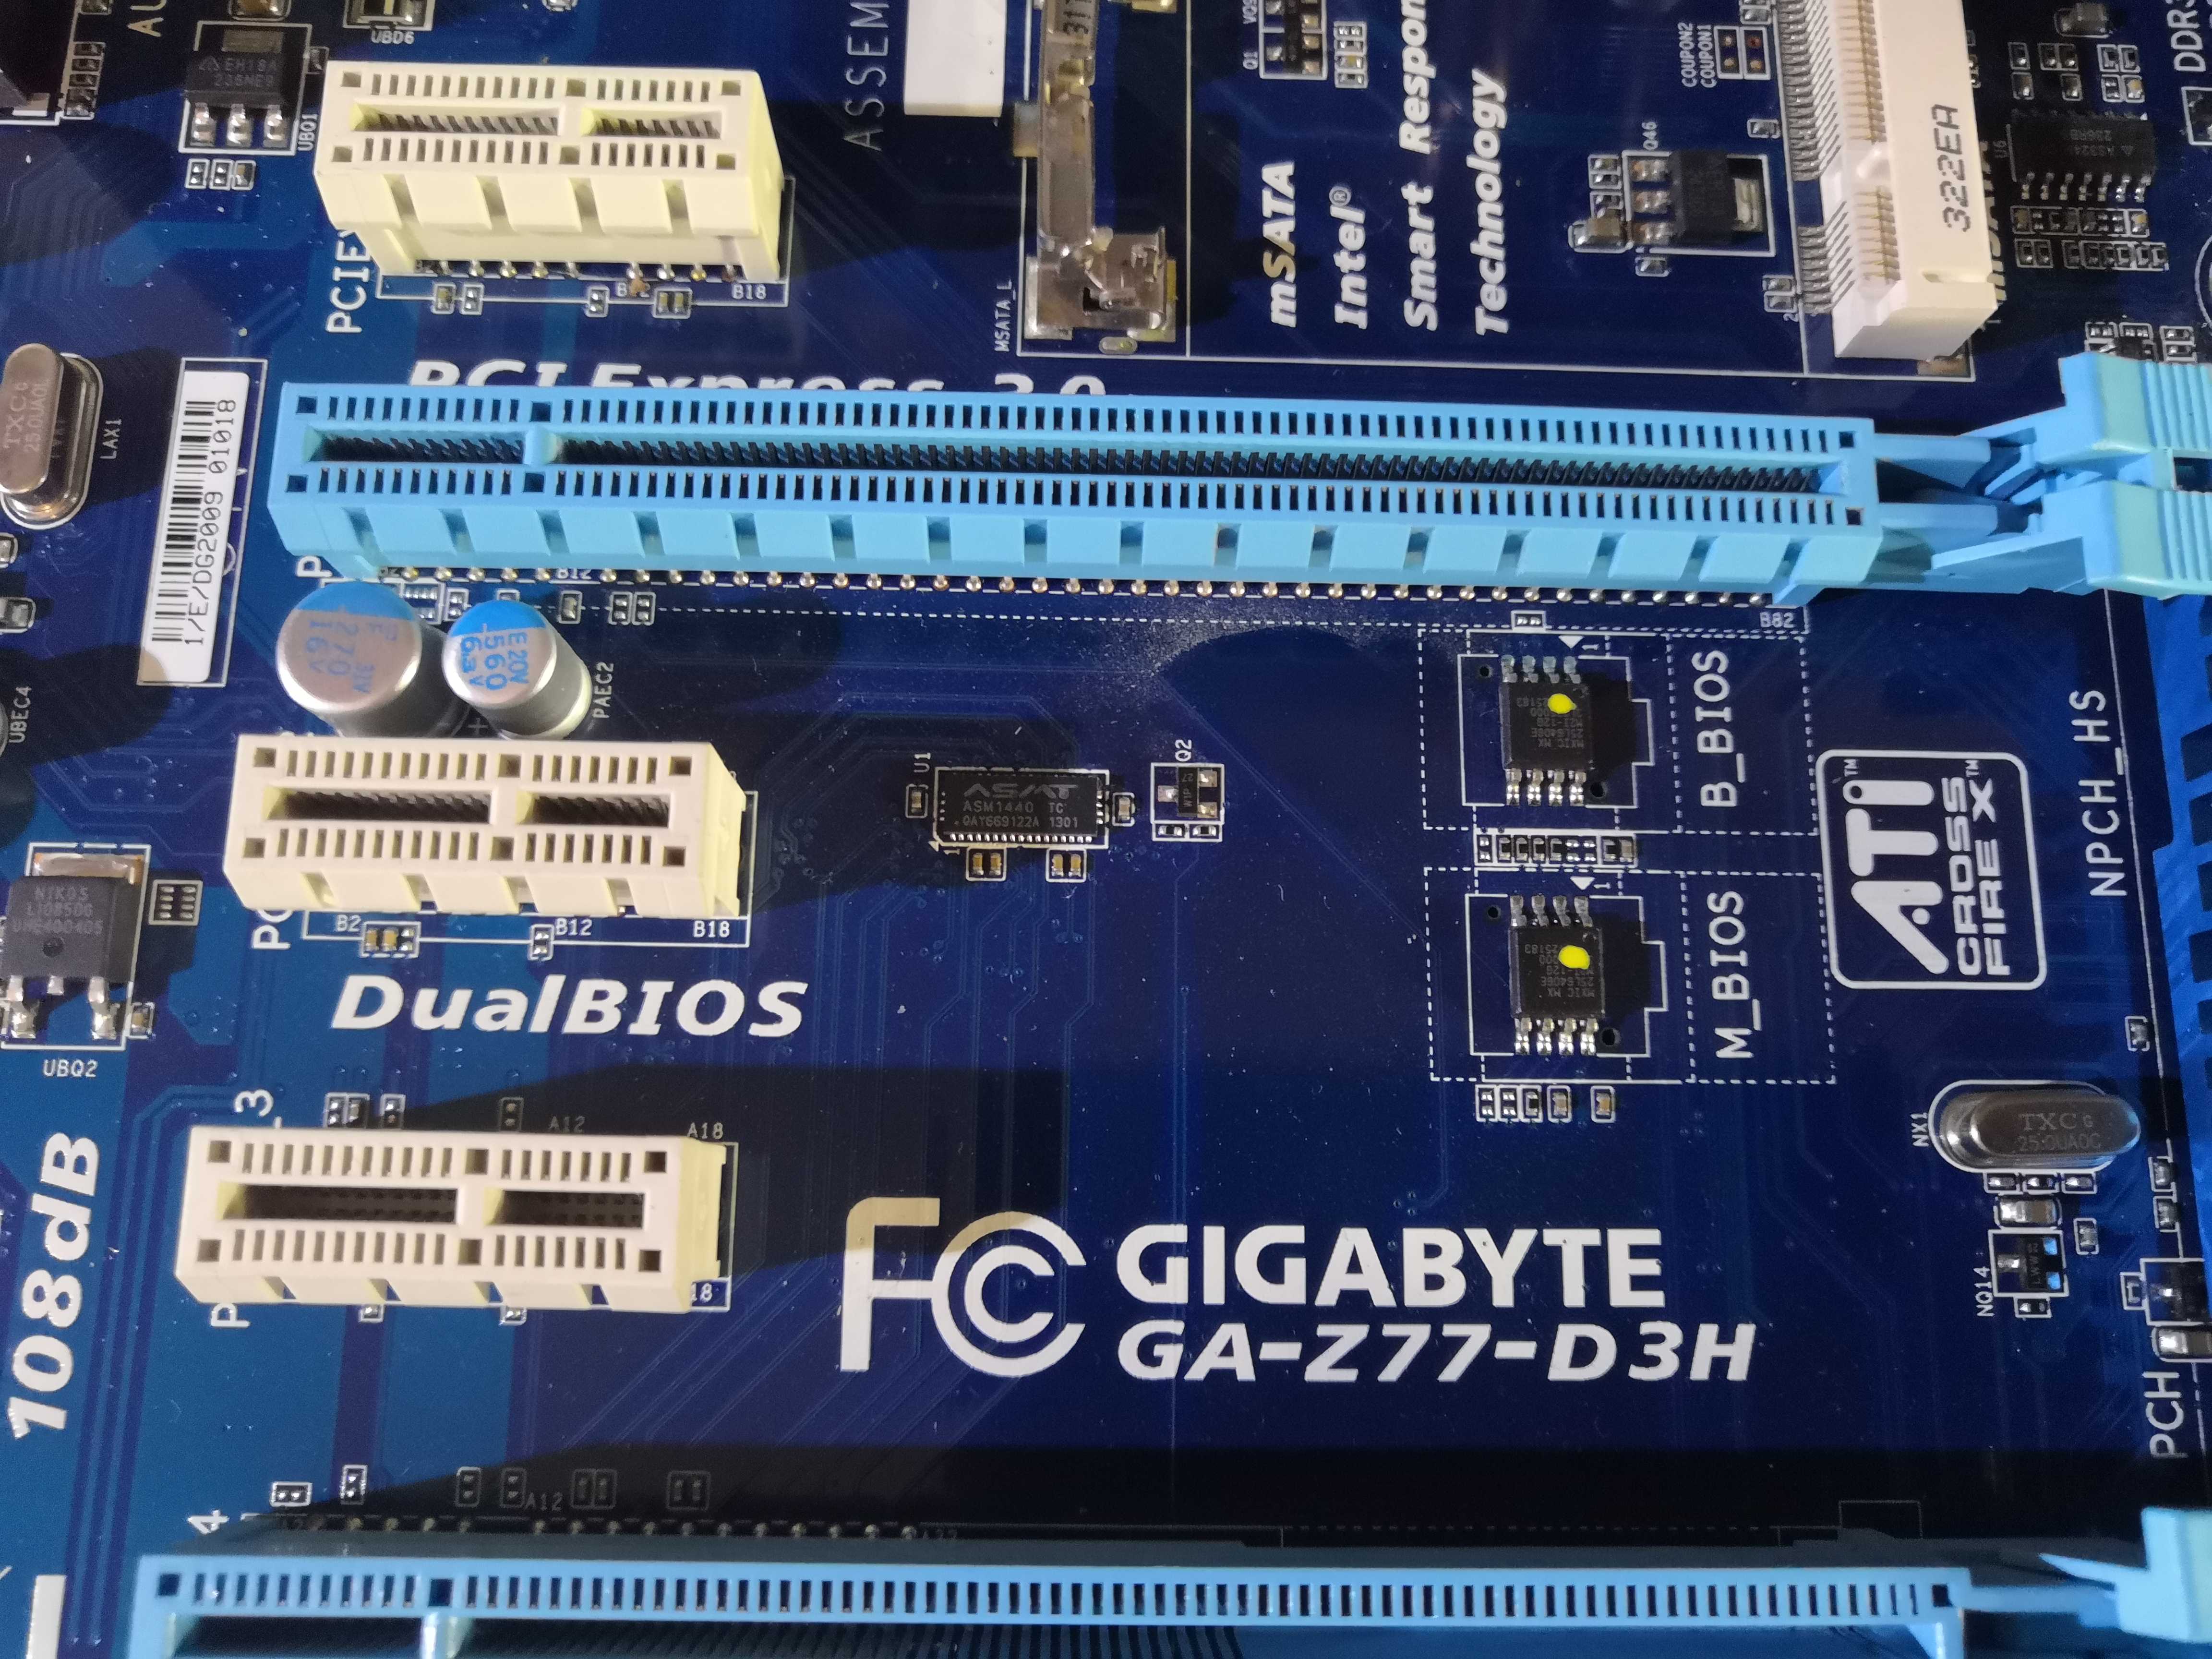
The Z77-D3H is equipped with the Gigabyte DualBIOS — two physically separate SOIC-8 chips, labeled B_BIOS (backup) and M_BIOS (main). The principle is simple: if the M_BIOS is corrupted, the B_BIOS detects the corruption at startup and rewrites the main BIOS from its healthy copy.
In theory, it’s perfect. In practice, it’s not great—or maybe I’m just unlucky.
Methods 1 and 2: Civilized Attempts for Gentlemen
Before breaking out the screwdriver, let’s try the software methods:
- Hold Power + Reset for 10 seconds: supposed to force a switch to B_BIOS. Nothing.
- PSU cycles: turn off the power supply, hold the power button, turn it back on, repeat. Nothing there either.
The board reboots in a loop without ever displaying anything. The B_BIOS doesn’t appear on its own. You have to wake it up manually.
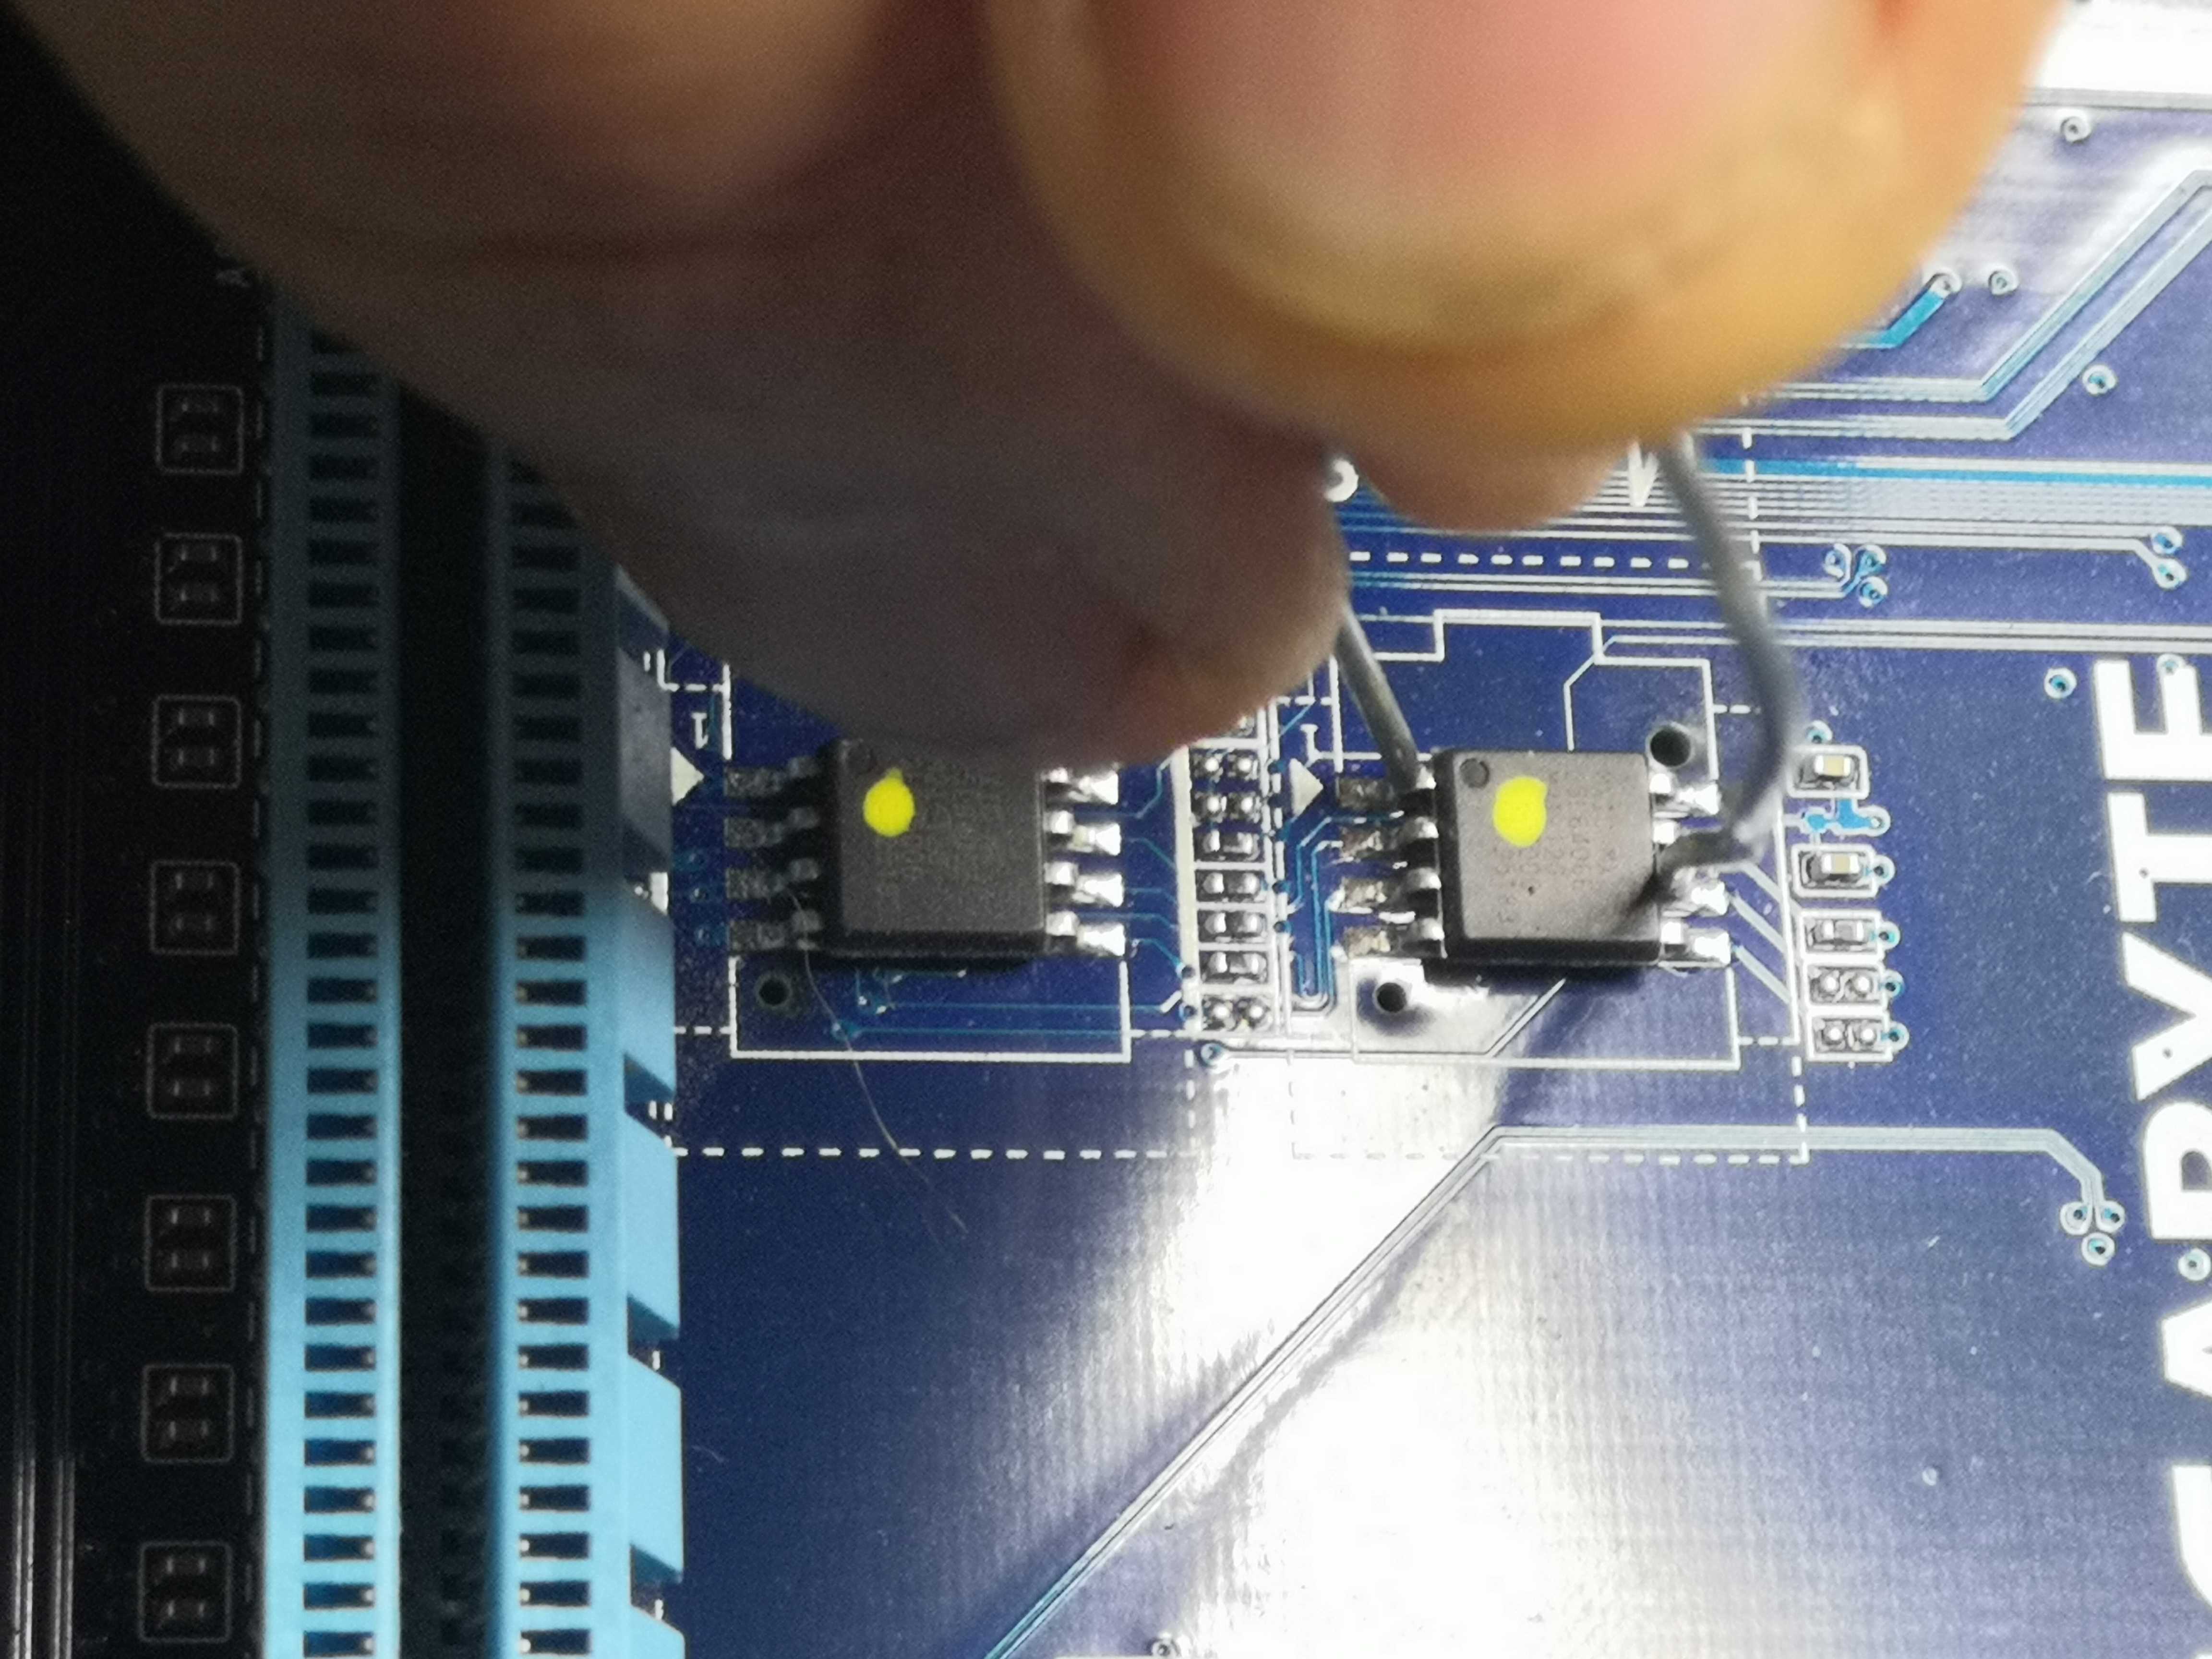
Method 3: The brute-force method—short-circuit pins 1 and 6 of the M_BIOS
This is the method documented by Gigabyte and widely discussed on forums. By shorting pins 1 and 6 of the M_BIOS chip while it’s powered on, you trigger the recovery routine embedded in the firmware.
The SOIC-8 pinout for reference:
   NOTCH
  ┌──┤├──┐
1 │      │ 8
2 │      │ 7
3 │      │ 6  ← pin 6
4 │      │ 5
  └───────┘
↑
pin 1
Pins 1 and 6 are diagonal — top left, second from the top on the right.
Important: Do not release the shunt at the first beep. You must hold it for 5 to 10 seconds after the beep to give the DualBIOS time to detect the corruption and display the prompt.
And there… it works. The screen lights up. Recovery starts.
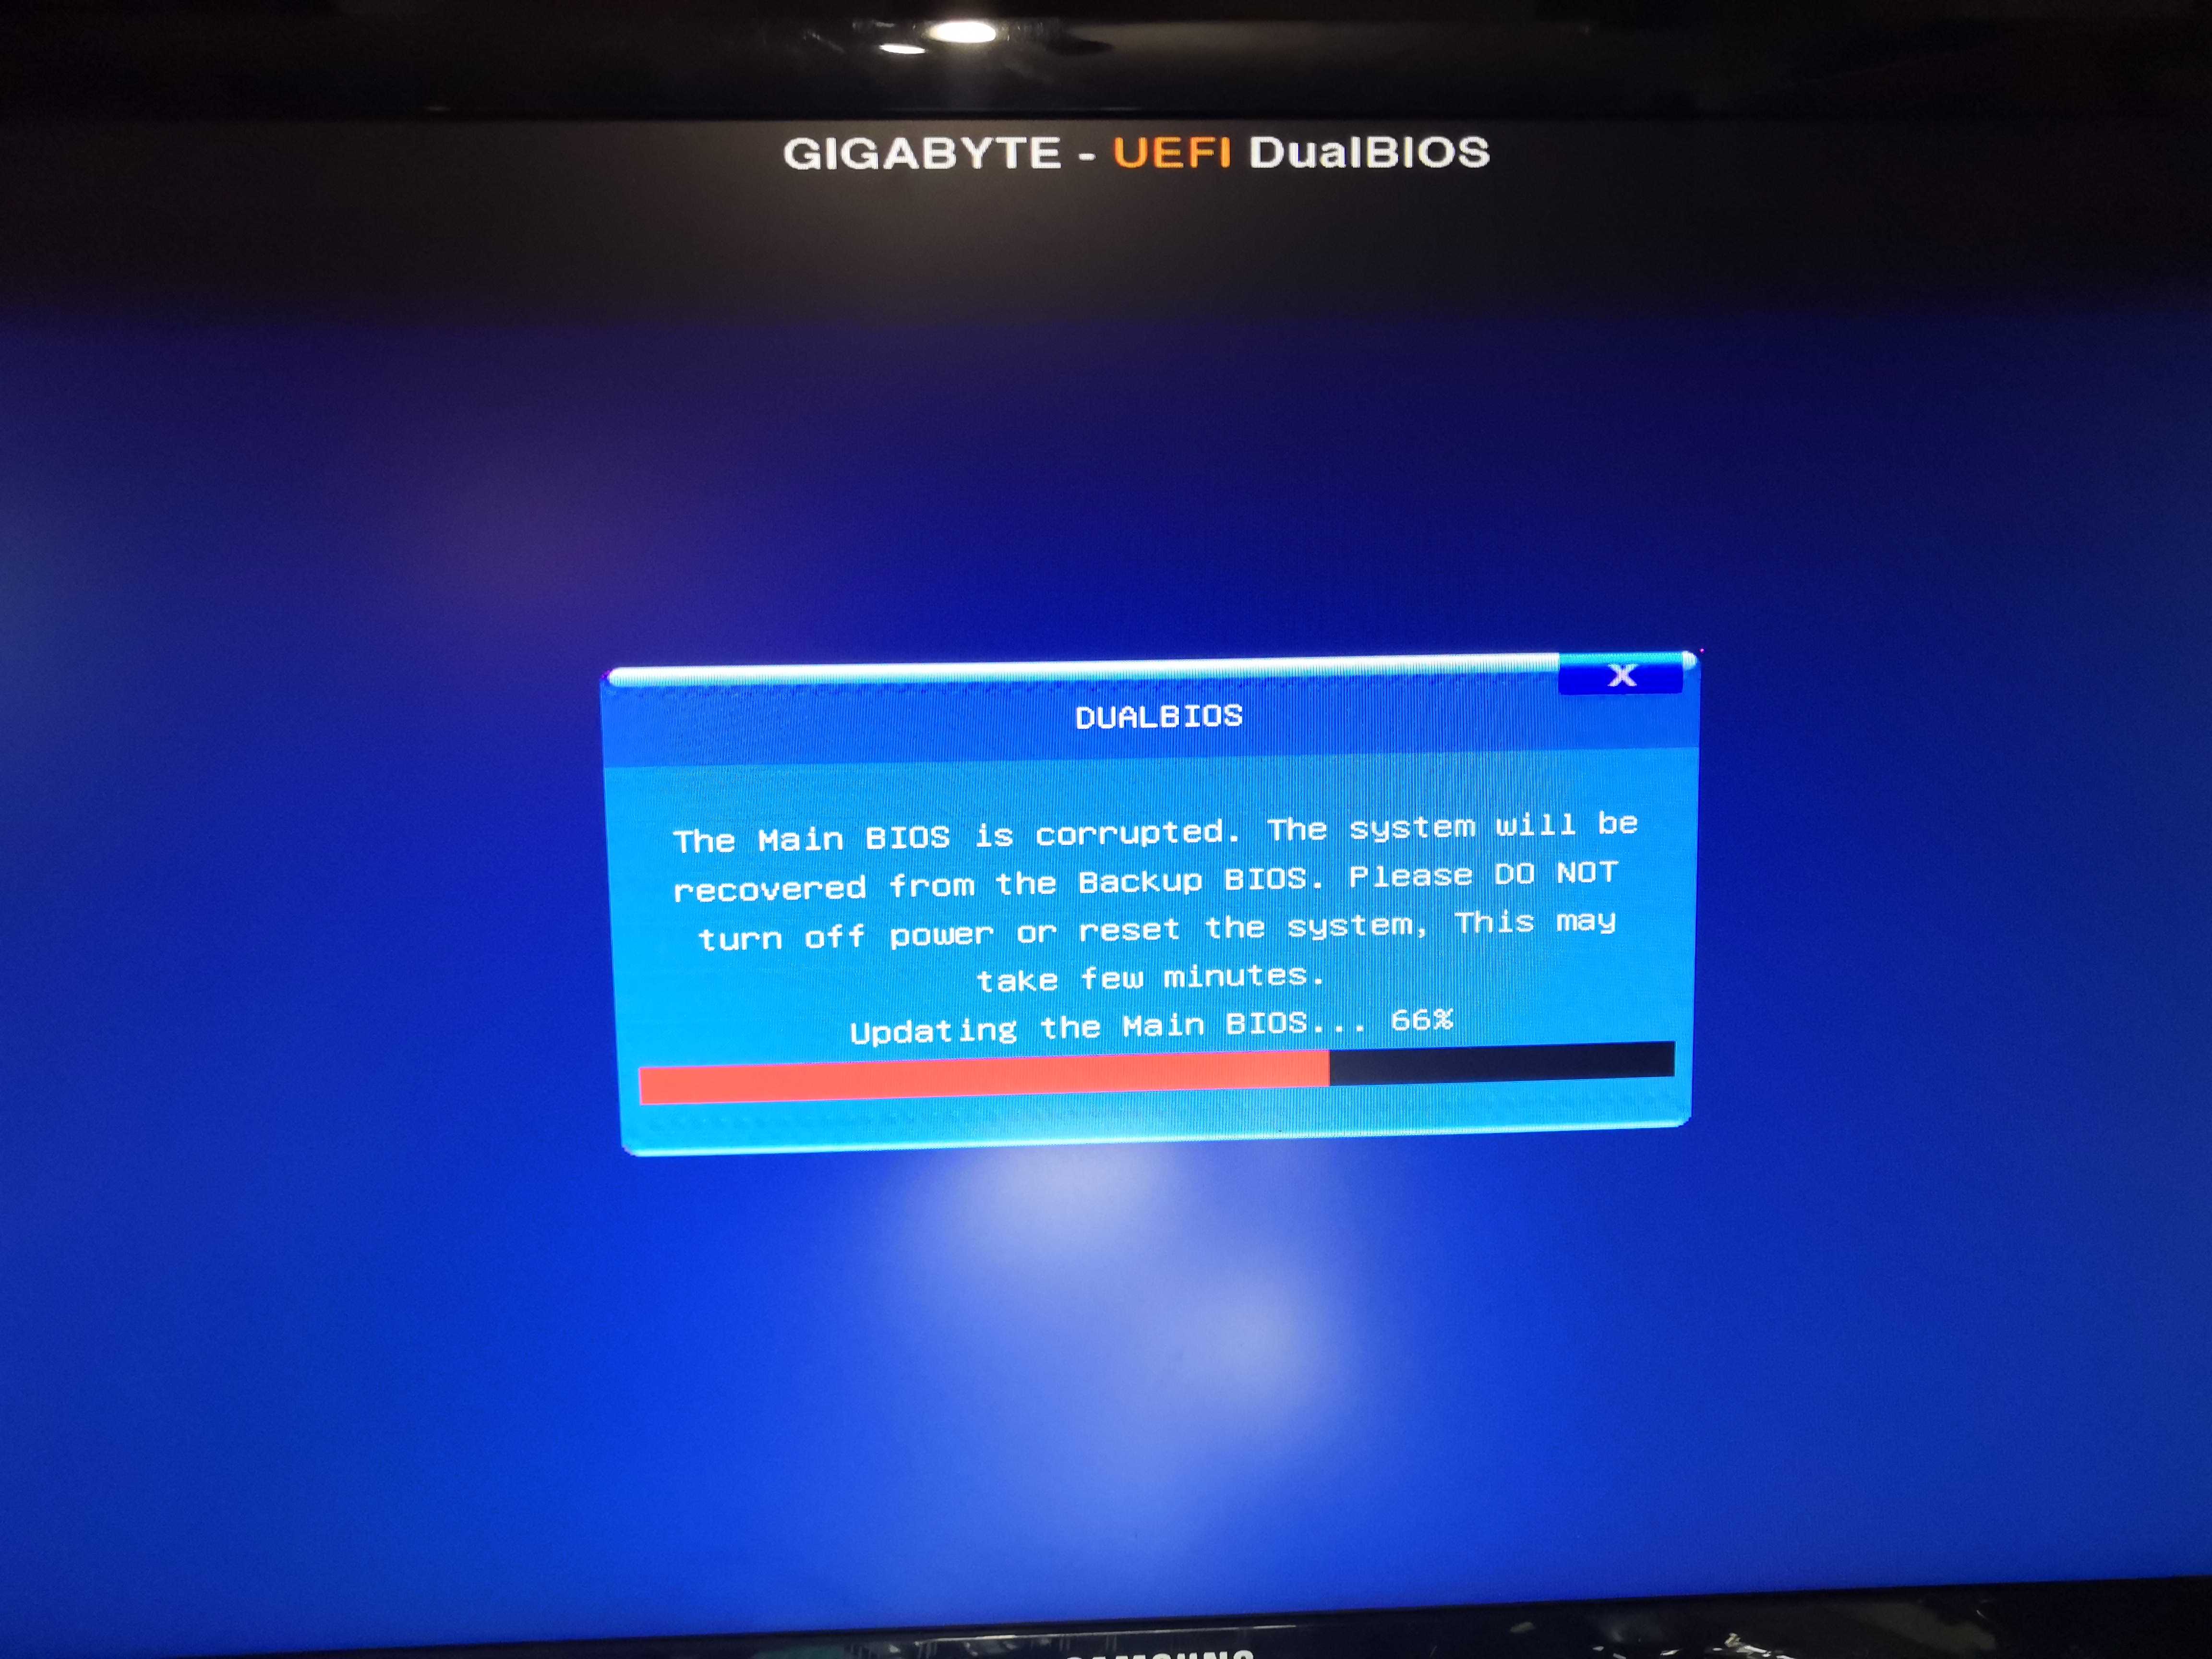
The B_BIOS has successfully detected the corruption and begins rewriting the M_BIOS. The progress bar moves forward. We breathe a sigh of relief.
And then at 100%… reboot, and miracle—the BIOS reappears
Epilogue
By holding the 1-6 jumper while the B_BIOS recovery finishes its work and releasing it just before the final reboot, the board boots normally. The BIOS is healthy, the system boots, everything works.
Technically, the rescue is a success.
However, if you’re a loyal reader of Aperturezone, you must be thinking, “Is that it? Is he giving up already?” Actually, I reflashed F22 with the same result and had to repeat the 1-6 jumper procedure.
I’m not going to push it; I’m going to leave it alone in its box.
A well-deserved retirement.